We've seen what happens when insulation isn't picked carefully—moisture sneaks in, energy bills climb, and suddenly you're facing repairs you never planned for. The way you place that vapor barrier is a big deal; it changes how moisture moves through your attic. In colder places where you're running the heat, the vapor barrier should face the living space. Warmer climates? The approach shifts a bit.
If you get a handle on the basics of both types, it gets a lot easier to decide what's right for your attic. Let's get into how vapor barriers actually work, what the codes want, and what it's really like to install each kind. Looking at performance and climate specifics, you'll be able to figure out which insulation makes sense for your attic.
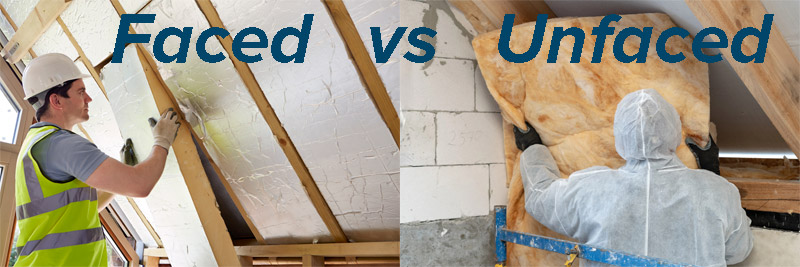
Fundamentals of Faced and Unfaced Attic Insulation
Attic insulation usually comes in two main flavors: faced (with a barrier layer) and unfaced (without one). The real difference? Whether there's something like kraft paper or foil glued to one side of the batt.
What is Faced Insulation?
Faced insulation means there's a layer stuck to one side—think kraft paper, foil, or sometimes vinyl. That layer works as a vapor retarder.
Paper-faced insulation is what you'll find in most homes. The kraft paper helps block moisture and keeps the insulation together. Lots of these batts have little flaps on the edges, so you can staple them right to studs or joists.
Foil-faced insulation works similarly but adds a bit of reflectivity. Sometimes that's helpful for keeping heat out. Keep in mind, some building codes might limit which facings you're allowed to use.
The key rule: the facing always goes toward the warm-in-winter side. So, in heated homes, the paper or foil faces the inside.
What is Unfaced Insulation?
Unfaced insulation is just the insulation—no paper, no foil, no barrier. It stays in place by friction between the joists, not staples or fasteners.
Unfaced fiberglass is popular for interiors where moisture isn't a big worry. It's often layered on top of existing attic insulation to pump up the R-value, and since there's no barrier, moisture can move through it both ways.
It's usually a bit cheaper—think $0.50 to $1.75 per square foot, compared to $0.50 to $2.00 for faced. Plus, without the paper, some unfaced types can be fire-rated, which faced batts usually can't.
That said, it's a little fussier to install. The batts can tear or separate if you're not careful.
Key Differences Between Faced and Unfaced Insulation
| Feature | Faced Insulation | Unfaced Insulation |
|---|---|---|
| Vapor Barrier | Includes kraft paper or foil | No barrier included |
| Installation Method | Stapled to framing | Friction-fit |
| Fire Rating | Not fire-resistant | Can be fire-rated |
| Cost per Sq Ft | $0.50-$2.00 | $0.50-$1.75 |
| Best Use | Exterior walls, new construction | Attic floors, adding layers |
The main thing to pay attention to is moisture. Faced insulation blocks vapor from passing through, while unfaced lets it move freely. That's why each type works better in certain spots.
Faced batts tend to be easier to handle since the paper keeps everything together. Unfaced? You've got to be a bit more gentle to avoid tearing.
If there's already a vapor barrier in your attic, use unfaced insulation on top. You don't want to sandwich moisture between two barriers—that's asking for trouble. The vapor barrier should only be on one side, based on your climate.
Vapor Barriers, Moisture Control, and Building Regulations
Getting vapor control right in the attic means knowing the difference between vapor barriers and retarders, understanding how moisture moves, and, honestly, making sure you're following the rules for your area.
Understanding Vapor Barriers and Vapor Retarders
People toss around "vapor barrier" and "vapor retarder" like they're the same, but they're not. A vapor retarder just slows down water vapor, while a true barrier stops it almost entirely. It's all about the perm rating: below 0.1 is a barrier, 0.1 to 1.0 is a retarder.
Kraft paper on most faced insulation is a vapor retarder, not a full barrier. It's kind of clever—it adapts a bit to humidity. When it's dry, it blocks vapor well. When things get damp, it lets moisture escape.
Foil-faced insulation is closer to a true vapor barrier and also reflects heat, which can help in hot climates. Whether you go with paper or foil depends on your climate and how much moisture control you need.
Moisture Control and Mold Prevention
Moisture vapor wants to move from warm to cold areas. In winter, that means indoor air tries to creep up into your cold attic. Without a vapor retarder, that moisture can condense on cold surfaces, setting the stage for mold and even rot.
That's why you want the vapor retarder on the warm side of the insulation, facing the living space. And don't double up on vapor barriers—never put faced insulation over faced, or add plastic sheeting on top of kraft-faced batts. That traps any moisture that does get in, which is pretty much a mold invitation. If you're adding insulation to what you already have, stick with unfaced batts or blown-in insulation.
Building Codes and Local Requirements
The International Residential Code says vapor retarders are a must in climate zones 5 through 8—places with long, cold winters. Local codes might tweak things based on your region's quirks.
Zones 1 through 4? The rules are all over the place. Some areas want vapor retarders, others don't. You've got to check with your building department before starting anything—no sense guessing and then failing inspection.
Inspectors do look at vapor barrier placement. Get it wrong, and you could be ripping it all out to do over. Codes also say no vapor barriers on both sides—again, moisture trap city.
Attic Insulation Performance and Installation Considerations
How well your attic insulation works depends on picking the right R-value for your area, installing it without gaps or squishing it down, and balancing cost with the energy savings you'll get back.
R-Value and Thermal Efficiency
R-value is just a measure of how well insulation resists heat flow. Higher is better. Most attics need somewhere between R-30 and R-49, depending on where you live and what the codes say.
R-49 is the go-to for chilly northern spots where heating eats up your wallet. Down south, where it's humid and you're fighting heat, R-30 to R-38 is usually enough. Every step up in R-value cuts down heat loss or gain, so your energy bills go down.
But you only get that R-value if you install the insulation right—no gaps, no squishing. Compressed insulation loses oomph, and any spaces between batts or around stuff like pipes just let heat sneak through.
Faced and unfaced insulation both hit the same R-values if you install them right. The facing just changes how moisture moves, not how much heat gets through.
Installation Best Practices
Before you even think about insulation, seal up any air leaks—around pipes, wires, chimneys, all of it. Otherwise, air just bypasses the insulation, making it kind of pointless.
With unfaced batts, you want them snug but not squished between joists. Sometimes you'll need supports to keep them from sagging, especially overhead. Faced insulation gets stapled with the barrier facing the living space, and you want it flat against the wood—no bunching or gaps. Never layer faced insulation on top of faced, or you risk mold and damage.
Cut the batts to fit around obstacles instead of cramming them in. That way, you keep the R-value and, if it matters, the fire rating. Unfaced insulation that's fire-rated can be left exposed in attics, but kraft-faced stuff usually needs to be covered up for fire safety.
Cost Factors and Material Selection
Unfaced batts run about $0.30 to $0.50 per square foot, faced a bit more—$0.40 to $0.65. The facing doesn't add much to the price, but it does mean a little more work to install.
Pick insulation based on your climate. Humid places sometimes benefit from unfaced batts with a separate vapor retarder, wherever the code says it should go. In dry areas, you might not need a vapor barrier at all, so unfaced is the budget pick.
Roll insulation is cheaper per square foot than batts but needs more cutting. If you've got a big attic, rolls can be faster. For smaller jobs, batts make things easier and less wasteful.
Professional installation usually runs $1.50 to $3.00 per square foot, labor included. Pros can finish faster and get the details right—air sealing, vapor barrier, full coverage. Doing it yourself saves money but opens the door to mistakes—gaps, compression, or putting the vapor barrier on the wrong side, which can all mess with your energy efficiency and even cause moisture issues.
Choosing Between Faced and Unfaced Insulation in Attics
So, should you go faced or unfaced? It comes down to your climate, what's already in your attic, and how you need to manage moisture. Faced insulation is for new installs where you need a vapor barrier. Unfaced is what you want if you're adding more layers—no sense creating a moisture trap.
When to Use Faced Attic Insulation
Faced insulation is the call for new installations where there's no vapor barrier yet. That paper or foil layer stops warm, moist air from making its way up and condensing in the attic.
When do you really need faced insulation?
- Humid climates where outdoor moisture is always high
- Cold regions where condensation is a big risk
- First-time attic installs with no existing vapor barrier
- Homes needing soundproofing (the facing helps a bit with noise)
The facing should always point down, toward the heated living space. That's what keeps moisture from sneaking in. And yeah, a lot of building codes require faced insulation for new attics—check before you start, because the rules shift from place to place.
When to Use Unfaced Attic Insulation
Unfaced attic insulation is a solid choice when you're layering over insulation that's already there. If you slap another vapor barrier on top of the old one, you're basically inviting trapped moisture and, well, all the headaches that come with mold and ruined materials.
We use unfaced insulation when:
- We want to bump up the R-value in attics that already have faced insulation
- The climate's dry enough that breathability actually matters for keeping things dry
- The house is older and there's already a vapor barrier hiding somewhere
- We need an extra layer but don't want to mess with building codes
Unfaced insulation lets vapor escape, assuming your attic's got decent ventilation. That's the key to avoiding condensation between layers—something you really don't want to deal with.
Honestly, there's not much of a price gap: usually just about ten to thirty cents per square foot. We pick based on what the job needs, not to save a buck, because using the wrong stuff can turn into a way pricier problem down the line.
Common Mistakes and How to Avoid Them
One of the biggest slip-ups? Installing faced insulation over an existing vapor barrier. That double layer just traps moisture, wrecking the insulation and practically inviting mold to move in.
Critical mistakes to avoid:
| Mistake | Consequence | Solution |
|---|---|---|
| Paper facing wrong direction | Moisture enters attic space | Face barrier toward living area |
| Double vapor barriers | Trapped condensation | Use unfaced for second layers |
| Compressed insulation | Reduced R-value | Maintain proper loft thickness |
| Gaps between batts | Heat loss and drafts | Fit materials tightly without compression |
Before buying anything, we always check the attic to see what's already up there. If there's old faced insulation, we only use unfaced on top—otherwise, you're just asking for trouble with warranties and building codes. Kind of a pain, but it's worth it.
It's easy to forget about ventilation, too. Even if you nail the insulation, without good soffit and ridge vents, moisture's going to collect and cause headaches down the road.
Need help choosing the right attic insulation?